Wednesday, March 30, 2011

Poppy Seed Chicken

I love chicken over rice.  Maybe it's the Chinese in me, but I go through rice like there's no tomorrow.  Stick some sort of chicken dish in the oven, cook a pot of rice, throw together a salad and voilà!  Dinner!  Sometimes I really have fun spending a lot of time making dinner, but let's be real.  It's so much nicer to be able to whip up a delicious dinner in 8 minutes and then relax on the couch until it comes out of the oven.  Poppy seed chicken is one of those easy, delicious dishes I like to have with my rice.  I've had different kinds of poppy seed chicken:  some that are really runny with the rice baked right into the casserole, and others that were way too dry and had no creaminess to stir into the rice.  I knew I needed to adjust the quantities of things to make it how I like it.  Well this recipe is spot-on.


Poppy Seed Chicken
3 1/2 cups chopped cooked chicken
1 can cream of chicken soup
1 cup sour cream
1/2 Tbsp poppy seeds
1 cup crushed Ritz crackers
1 1/2 Tbsp melted butter

Mix sour cream, soup, and poppy seeds until well combined.  Stir in the chicken and make sure all of the meat gets coated with the creamy sauce. Pour into greased 8x8" dish.  Mix the crushed Ritz and the melted butter together.  Sprinkle over the chicken.  Cover with foil and bake for 15 minutes at 375 degrees.  Remove the foil and bake another 10 minutes, or until bubbly. Serve over rice.  Serves 4-5.

You can use fat free soup and sour cream, if you want a little bit of a healthier option.
You can also sauté some mushrooms and stick those in too, if you like that sort of thing.

Source:  recipe adapted from Paula Deen's Best Dishes:  Southern Family Favorites

Tuesday, March 29, 2011

Chalk Pieces

Remember back in the day when there were chalkboards in classrooms?  But then they got tossed aside and dry erase boards took over.  And then everyone loved dry erase boards better because you can write so much faster and the marker never breaks and there's never that terrible noise that gives you the chills and makes you want to run and hide.  So here we are today with chalkboard-free classrooms and little kids trying to get high on dry erase markers thinking they're Sharpies.  Well I think the chalkboard and his chalk had it, because there are products with mini chalkboards on them everywhere!  There's glasswarea cheese boarda vase, and even a pillow!  But then there are a few things that are really practical and a little chalkboard is perfect for them.

finally can label those leftovers in the fridge. but 
with something a little more descriptive than "leftovers"
joanne hudson basics


the kids can get a different placemat every night!
paper source


don't have to use red Solo cups and write your name in 
Sharpie, but also don't have to worry about anyone else's backwash
uncommon goods


can update your cookie jar's contents as needed
pier1


calendar, to-do list, and coat rack all in one
bed bath & beyond


this is my favorite.  it's modern, unique, and practical.
uncommon goods

Monday, March 28, 2011

Best Banana Bread

Since I just recently discovered my new favorite banana muffins, I decided I needed to re-vist my favorite banana bread.  This banana bread is so good!  I made it for Caleb one of the first weeks we were married, knowing he would love how delicious it is and how much bread it makes.  I believe his first comment when he walked in the door was, that's huge!  Success.  So I made this bread again last week and we were able to eat it all week.  I made it on Monday, and when I had my last piece on Friday, it was still very moist.  Success.  Don't be alarmed at how many ingredients this recipe calls for; this recipe is for a bundt pan, not just a loaf pan.


Best Banana Bread
2 sticks butter, softened*
1 1/2 cups + 2 Tbsp sugar
3 eggs
3 large bananas, mashed (about 1 1/2 cups to 1 3/4 cups)
4 cups + 2 Tbsp flour 
1 tsp baking soda
1 1/2 tsp baking powder
1 1/2 cups sour cream

Cream butter and sugar.  Add eggs one at a time, beating a few seconds after each addition.  Add mashed bananas and beat.  Combine dry ingredients separately.  Add dry ingredients and sour cream alternately to the mixing bowl, mixing after each addition.  Beat well until all combined.  Grease and flour bundt pan.  Pour batter into bundt pan and bake at 350 degrees for 1 hour 10 minutes, or until toothpick comes out clean.  Invert on cooling rack and allow cake to cool slightly before slicing and baking.  Cover tightly with saran wrap or store in airtight container to keep moist.

*I actually used salted butter in this recipe.  That's the only way I've ever made it.  But also, this recipe doesn't call for any additional salt, nor does it have any vanilla for the salted butter to mask the flavor of.


Happy Monday!

Source:  recipe from the pioneer woman

Saturday, March 26, 2011

Friday, March 25, 2011

One Year After Yes

A year ago tonight, Caleb asked me to marry him.  That was one the best days of my life, trumped only by our wedding day.  I was so happy that we finally told each other that we loved each other.  I also remember this overwhelming feeling of relief.  We had been talking about getting married for several months, so it was nice to be able to let everyone else know we were planning on spending our lives together.  Caleb hadn't told anyone he was planning to propose that night (which was definitely how I wanted it - I didn't want to be the last one to know I was getting engaged!), and it was so fun announcing it to our family and friends throughout that weekend.  I am very hard to surprise, but Caleb totally surprised me with the timing of his proposal.  I had no clue he had already talked to my dad, because he was sneaky about it and came into town one night during the week.  We had only looked at rings for the first time the weekend before, so I didn't think he would buy one so quickly.  I think he had the ring for a total of an hour before it was on my finger!  Everything about the proposal was so perfect!  And Caleb proposed with the ring I've wanted my entire life.  It was a perfect night.  One year later, we are seven months into our marriage.  We have gotten to know each other even better, we have grown to love each other more, and I am very excited to see where we are in another year.  Here are just a couple of our engagement pictures:


Source:  all images by Colling Photography

Thursday, March 24, 2011

Bookshelf Love

I've always had this thing for bookshelves.  It may stem from my thing for books.  But I especially love built-in bookshelves, or floor to ceiling bookshelves.  It is my dream for us to own a home one day with a ridiculously awesome library, complete with a ladder and all.  But if that doesn't happen, I hope we have built-in bookshelves somewhere in the house.  Here are some for inspiration:

via a cup of jo

via trish lawrence

via trish lawrence

via trish lawrence

via eva designs

via loving living small

via delight by design

via delight by design

What home inspiration are you finding these days?

Wednesday, March 23, 2011

A Fun Surprise

Today as I was making my morning coffee, the doorbell rang.  And, like every other time I'm not expecting anyone, it really startled me.  But then I looked out the window and noticed the mail truck was in front of our house.  Realizing it was just Ken (yes, I know our mailman's name), I headed to the front door and tried to think if I had done any online shopping recently.  Nothing was coming to mind, so when Ken handed me a priority mail box, I was super excited to have a surprise!  I love getting mail, but getting a package ranks above all else in the hierarchy of USPS deliveries.  I saw that it was from Mrs. Raybuck, the mother of my dear friend Ashley who got married last weekend (check out their wedding pictures here!).  As I was opening it I was trying to remember if I had left something at their house or at the church in the busyness of the wedding weekend.  What I saw when I opened the package was this:


Yes!!  Those are the most adorable egg cups you've ever seen!!  Mrs. Raybuck remembered that I wanted egg cups, saw these cute ones, and couldn't resist them for me!  These are so happy and springy, and way cuter than any of the ones I had seen!  I love them!


I am so excited to have my own set of egg cups.  


Family, friends, potential future guests:  you now are welcome to ask for a boiled egg for breakfast.  I will be more than happy to oblige.  And even if you don't want one, I might put these on the breakfast table anyway...

Thank you so much, Mrs. Raybuck!!

Tuesday, March 22, 2011

Hello Spring! Hello Yellow!

Remember way back when life was wintery and gloomy and I said I needed more yellow in my life?  Well apparently Kate is also in agreement, because the Kate Spade color for March is yellow!  yay!  I was looking through the collection and felt so happy seeing all of the yellow.  What better way to celebrate the arrival of spring than with some yellow accent pieces?

love this spring tote


happiest iphone 4 cover ever


hat for the beach, anyone?


I think I need this


make a statement with this bib necklace

the perfect purse

Monday, March 21, 2011

Strawberry Scones

This past Friday was such a good day.  The sun was shining, it was like 72 degrees out, and I was wearing flip flops.  So naturally to make a good day even better I went shopping.  After I came home with everything I had set out to buy (and they all were great deals), I had the urge to bake.  I pretty much have the urge to bake every day, but Friday I just kept going.  I made some granola for our breakfasts this week.   Then I made some pizza dough for our dinner.  Then I decided to try a new recipe for some scones.  I am picky about scones because sometimes they're dry and crumbly and gross.  Last week Kroger had beautiful strawberries on sale, so I wanted to use them and scones were the way to do it.  I have one recipe for scones that is my absolute favorite that I will share at another time, but I was happy to find another scone recipe that I also liked.  The only bummer about scones is that the eight wedges seem to disappear much faster than a batch of muffins...


Strawberry Scones
2 cups flour
2 Tbsp sugar
2 tsp baking powder
1/2 tsp salt
1/3 cup butter, softened
1 egg
1/2 cup heavy cream, plus more for brushing
3/4 cup chopped strawberries (not slices, but pretty small pieces)
1 Tbsp sugar

Place flour, sugar, baking powder, salt, and butter in bowl and mix until combined.  Add egg and 1/2 cup heavy cream; mix until soft.  Fold in the strawberries.

Knead dough a few times on lightly floured surface.  The strawberries will not want to incorporate well; I found that I kind of needed to just smoosh them into the dough.  Pat the dough into a circle about 1/2 inch thick.  Cut into 8 wedges.  Place wedges two inches apart on a baking sheet lined with parchment paper.  Brush the tops of the wedges with a little bit of heavy cream and sprinkle with sugar.  Bake for 10-12 minutes at 425 degrees, or until cooked through.  Serve warm.

Source:  recipe altered from How To Simplify

Sunday, March 20, 2011

Weekend Recap

Today is the first day of spring!  Yesterday's weather felt more springy than today, but I am just thankful that winter is over.  Caleb and I have had such a fun weekend together.  Here is some of what we've done:

When I got home from breakfast with a friend Saturday morning, 
Caleb had surprised me and left flowers on the table!


Busted out our picnic basket for the first time


Fresh strawberries to eat on our picnic in the park


 Grilled out with our new grill


Success at the used bookstore:  The Help for $1!


Had a lazy Sunday morning and ate homemade crêpes


Got free Georgia Peach ice at Rita's!


Basically we just enjoyed being together.  I hope all of your weekends were equally wonderful!  And here's the recipe for crêpes.  These are so easy and are perfect for spring and summer with fresh fruit and yogurt.

Simple Crêpes
1 cup flour
1 Tbsp sugar
1/4 tsp salt
1 1/2 cups milk
4 eggs
3 Tbsp unsalted butter, melted

Combine all ingredients in a blender.  Purée until mixture is smooth and bubbles form on top, about 30 seconds.  Let batter sit at least 15 minutes at room temperature.  Heat a 12-inch nonstick skillet over medium heat.  Lightly coat with butter.  Add 1/3 cup batter and swirl to completely cover bottom of skillet.  Cook until underside of crêpe is golden brown, 2-3 minutes.  Loosen edge of crêpe with a rubber spatula, then with your fingertips, quickly flip. Cook 1 minute more.  Slide crêpe out of skillet and repeat with remaining batter.  Coat the pan with butter as needed.

Source:  recipe from Every Day Food, January/February 2011

Friday, March 18, 2011

The Soufflé: Conquered

Have I mentioned how much I love my Kate Spade calendar/planner?  When I first saw it last fall, I immediately knew I needed to have it.  First of all, everything Kate Spade is brilliant - I love it all.  But second, this calendar is what got me started on fun, cute illustrations.  Every month has a different one (see all of them here) and then a little phrase telling you to do something to help you live colorfully.  Anyway, I needed this planner.  But it was already sold out online!  Thankfully the weekend coming up we had decided to go to DC for a fun getaway, so I decided I would just get the planner at the Kate Spade store in Georgetown.  

So at the end of our day walking around DC, we drove to Georgetown.  Silly us, we get there about 5 PM on a Saturday.  We literally sat in traffic/looked for a parking spot for over an hour.  It was just getting ridiculous so we decided to can Georgetown and just drive home.  I was so disappointed.  I had seen the Kate Spade store, was so close to having my hands on the most perfect planner ever, and then we were gone.  (I was also bummed I didn't get to go into the Godiva store, because I get a free piece of chocolate every month for being a member.)  The next morning I checked the Kate Spade online store to see what the status of the planner was - thankfully they were in stock again!  I quickly ordered it and received it the first week of October.  I told my mom she could give it to me for Christmas, and it was definitely worth the wait and is one of my favorite things.  ok super long story to get to my point:
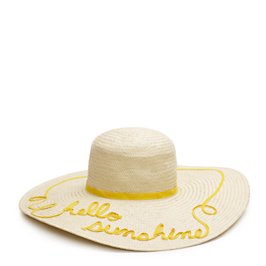

march
conquer the soufflé


This is the picture and suggestion for March.  This is my absolute favorite illustration of the year.  I am going to frame it and hang it above my stove in the kitchen because it is just too cute to not.  Because I love it so much, I decided that I really would try to make a soufflé.  I always thought soufflé was this impossibly difficult thing to make with a nasty smooshy texture.  I am a big textures girl, so that totally grossed me out.  But I decided to suck it up and try it anyway.  Even if it was gross at least I could say I tried it.  

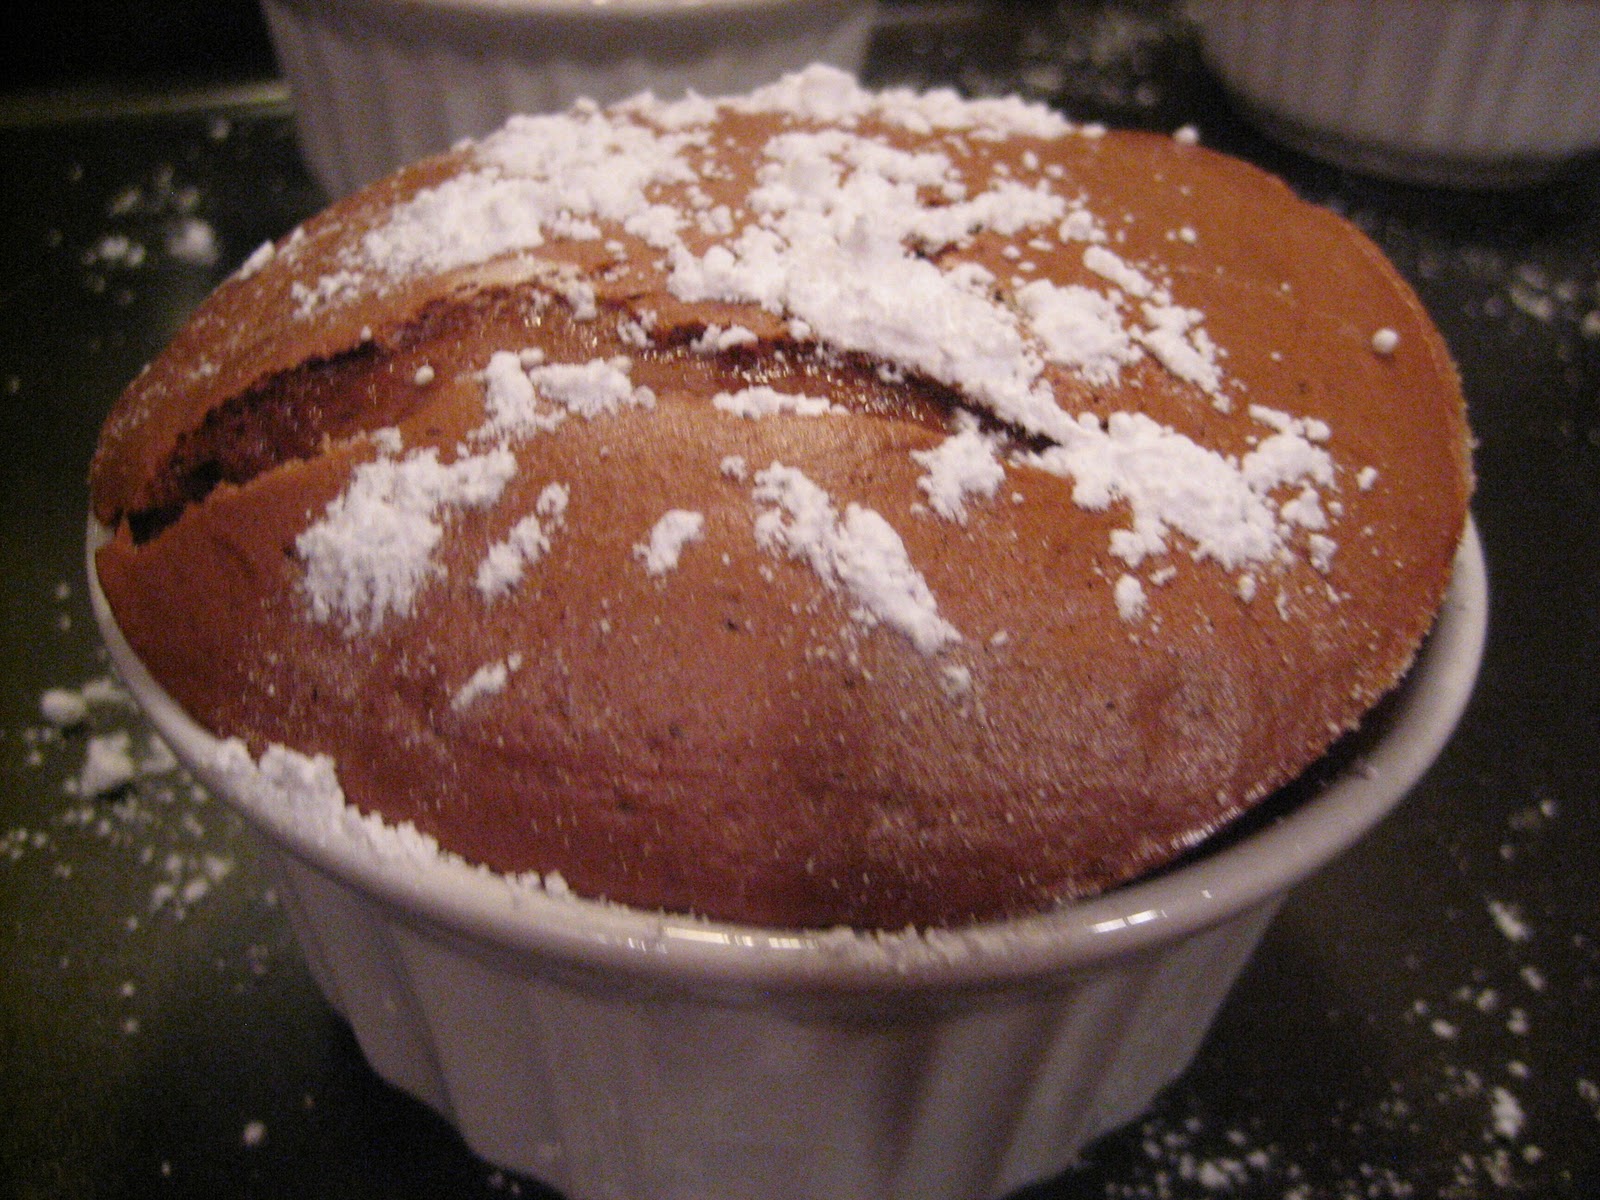
I will say this is one of the most interesting/science experiment-like things I have ever made.  So many different things going on at once and then you combine them all and voilà!  It poofs and it's soufflé!  But, it was so worth it!  The texture was not weird at all, it's actually liquid on the inside but not in a gross way.  It was so chocolately and rich and was one of the most intensely delicious things I have ever eaten.  So if you're feeling adventurous and craving chocolate, whip up this soufflé!  

Individual Chocolate Soufflés
1/3 cup sugar, plus more for ramekins 
3 large egg whites, room temperature, plus 3 large egg yolks
1/8 tsp cream of tartar
5 1/2 ounces bittersweet chocolate, melted (I used Ghiradelli 60% cacao)*
2/3 cup milk (not skim)
1 Tbsp plus 1 1/2 tsp cornstarch
1/8 tsp salt
3 Tbsp sour cream

Whisk egg whites with a mixer until frothy, about 2 minutes.  Add cream of tartar; whisk until soft peaks form.  Add 1/3 cup sugar; whisk until medium peaks form, about 5 minutes.

Melt the chocolate.  I used the double boiler method; I will never try to melt chocolate in the microwave again!  The double boiler method is flawless.  After melting the chocolate, pour into a large bowl.

Whisk milk into cornstarch and salt in a small saucepan.  Bring to a simmer.  Cook, stirring, until thick, 1-2 minutes.  Whisk this mixture into the chocolate.  Whisk in egg yolks and sour cream.  Gently fold in the egg white mixture.

the batter, before baking

Spray four 7-ounce ramekins (I love my Corningware ones) with cooking spray, then coat with granulated sugar.  Fill ramekins evenly with batter.  Bake on a baking sheet at 400 degrees, rotating halfway through, until soufflés rise but centers are still liquid, about 14 minutes.  Dust with confectioners' sugar.  Let sit for 2 minutes.  Serve.

*Use whatever chocolate is your favorite, the better quality the better. 

(The batter can be made up to three hours ahead.  After pouring the batter into the ramekins, stick the ramekins in the fridge until ready to bake.)

my first soufflé!


Source:  recipe altered from Martha Stewart Living, January 2011

Thursday, March 17, 2011

Swimsuits: Part Deux

The last time I posted some swimsuits was way back in January.  And I said I wouldn't buy a swimsuit until at least April.  Well I am pleased to report that I have held to that and have not bought one yet!  But now April is only 15 days away, so I've again started some online perusing of swimsuits!  Here are some of the ones that caught my eye.

The florals:

Abercrombie

Old Navy

The ruffles:

Hollister

Charlotte Russe

The stripes:

Abercrombie & Fitch

Net-A-Porter


The polka dots:

Anthropologie

Jessica Simpson


The classics:

Hollister

Quik Silver