Thursday, September 27, 2012

What I Love About Fall: Making Applesauce

In reading One Thousand Gifts the past few weeks I've been challenged to slow down and give thanks - even for the little things.  I've realized that I hurry through everything: hurrying to get ready and leave for work in the morning, hurrying to fix dinner, hurrying through the week to get to the weekend, hurrying to the next vacation or holiday or anticipated event.  I hate that I do that!  I miss out on the little joys and gifts along the way, when I really should be savoring those moments and giving thanks for them.

So, I'm going to start sharing "What I Love About" posts.  A post every now and then capturing something I'm thankful for, big or small.  I want to train myself to give thanks in all things, and I want to stop myself from taking so many things for granted.  

First up: what I love about fall is making applesauce (I made this recipe).  The reason I enjoy making applesauce is kind of ironic in light of what I just wrote about hurrying:  I enjoy making applesauce because it forces me to slow down.  Homemade applesauce is certainly not a necessity; most people just buy it from the store because it's quick and easy.  But I love stopping and taking the time to peel and chop all of the apples.  Waiting as they cook on the stove and soften and break up, filling the house with the scent of apple and cinnamon.  It's a fall ritual for me, and I find it both comforting and rewarding.  And I am thankful for it.


Tuesday, September 25, 2012

Lemon-Poppy Seed Zucchini Bread


What comes out of my kitchen is usually a pretty good indicator of what season we're in.  Pumpkin and apple baked goods clearly mean fall, so I went a little astray this past weekend with this lemon-poppy seed bread.  I saw this recipe in one of my magazines weeks ago and thought it sounded too good to put off until next spring or summer.  I'm so glad I made it; it has just enough of a lemon taste and the zucchini really keeps the bread moist.

Lemon-Poppy Seed Zucchini Bread
1/2 cup butter, softened
1 1/3 cups sugar
3 eggs
1 1/2 cups flour
1/2 tsp salt
1/8 tsp baking soda
1/2 cup sour cream
1 cup shredded zucchini
1 Tbsp lemon zest
2 tsp poppy seeds

Beat butter at medium speed with an electric stand mixer until creamy.  Gradually add sugar, beating until light and fluffy.  Add eggs, one at a time, beating just until blended after each addition.

Stir together flour, salt, and baking soda.  Add to butter mixture alternately with sour cream, beginning and ending with flour mixture.  Beat at low speed just until blended after each addition.  stir in zucchini and next two ingredients. Spoon batter into three greased and floured 5x3" loaf pans.

Bake at 325 degrees for 40-45 minutes or until a wooden pick inserted in center comes out clean.  Cool in pans on wire racks 10 minutes; remove from pans to wire racks, and cool completely (about 30 minutes).

source: recipe from Southern Living, August 20212

Monday, September 24, 2012

A Fall Weekend

This past weekend was a perfect weekend to welcome fall.  We headed up to the apple orchard on Saturday morning and ended up with a little over 20 pounds of apples.  Even though it was pretty hot out and we were wearing shorts, seeing all of the apples and pumpkins and children going on hay rides helped me channel the feeling of fall.  After lunch we headed into nearby Hendersonville to check out a few of the local shops.  It was a beautiful day to be outside, and even a beautiful day for driving home through the mountains, windows open.  The rest of the weekend included eating dinner outside, a movie, and a busy Sunday afternoon getting things done around the house.

How did you spend your weekend?


Friday, September 21, 2012

Happy Friday + Fall!


The first day of fall is tomorrow!  Autumn is my favorite time of year:  I love the cool evenings, cozy sweaters, pumpkin baked goods, sweaters, and just that fresh feeling that seems to come with the change of season.  We're starting off the season by heading to the apple orchard tomorrow (so excited!), so I thought I would share the rest of my fall bucket list.  

1. Buy mums for the front porch
2. Pick apples
3. Go to a college football game
4. Buy a dutch oven and make lots of soups & stews
5. Carve a pumpkin
6. Find a new flannel shirt
7. Get some Joe Beans pumpkin spice coffee beans (my favorite for fall!)
8. Take the MG out for some pretty drives

What makes you excited for fall?    

(image via here)

Thursday, September 20, 2012

Our Home: The Backyard

I know that all I've shared from our new house is our bedroom paint, but that's because none of the rooms are completely done yet!  The guest bedroom is actually looking like it's going to be completed first, so be on the lookout for that in the next few weeks (ok, maybe months).  So today I thought I'd share our backyard!  Here's our yard tour, if you'd like to see :)

A huge must for us in looking for our house was big trees.  We love the privacy we have in the back (and all the shade!).  Our garden box used to have our sunflowers and tomatoes but now it's empty.


One of our new blueberry bushes!  We have been wanting blueberry bushes for a while, and just this past Saturday we bought two from the berry guy at the farmer's market.  He shared all of his tips and tricks (like this variety of blueberries loves the red clay - who knew?!), so hopefully we'll have a full crop next spring!  (side note: The bushes are supposed to grow to be pretty large, so I'm hoping the ugly pipe will be covered up, too!)  I'm so excited to walk outside my door and be able to pick fresh berries!


Our row of knockout roses.  I can take zero credit for these; they were here when we moved in.  Over the past five months we've lived here, they've bloomed and drooped and come back about four times!  I love them!


This is our play fort/shed!  When we moved in this was a really dumpy-looking fort.  Caleb pressure-washed and stained the fort, and then he completely built the bottom part to make it a shed - walls, door, and everything!  It looks SO much better now, and it's great for storage for him and a fort for our future kids :)

Tuesday, September 18, 2012

Salted Caramel Chocolate Shortbread Bars


Every now and then I come across a recipe that looks like it might actually be worth all of the time the lengthy instructions seem to indicate it will take.  These bars are an example of such a recipe.  There's a shortbread crust, topped with homemade caramel, then finished off with a chocolate glaze on top.  You know that any dessert that takes five sticks of butter is going to be delicious!  This dessert is time-consuming, but mostly because each layer needs to sufficiently chill before the next layer.  Make them when you're going to have a crowd and they will be a big hit! 

Salted Caramel Chocolate Shortbread Bars
for the shortbread:
2 cups flour
2 tsp baking powder
1/4 tsp salt
1 cup (2 sticks) unsalted butter, room temperature
1/2 cup sugar

for the caramel:
1 cup (2 sticks) unsalted butter, cut into pieces
1 cup sugar
4 Tbsp light corn syrup
2 (14 oz) cans sweetened condensed milk

for the chocolate:
8 oz semisweet chocolate, finely chopped
1 tsp light corn syrup
1/2 cup (1 stick) unsalted butter, cut into pieces
fleur de sel or sea salt, for sprinkling

To make the shortbread layer, preheat the oven to 325 degrees.  Line a 9x13-inch baking pan with parchment paper. In a small bowl combine the flour, baking powder, and salt.  Stir with a fork to blend, and set aside.  In the bowl of an electric mixer, beat the butter and sugar on medium speed until well blended, about 1-2 minutes.  With the mixer on low speed blend in the dry ingredients just until incorporated.  Transfer the dough to the prepared baking pan and press in an even layer over the bottom of the pan.  Bake 15-18 minutes or until golden.  (If the crust puffs up a bit while baking, just gently press it down while it is cooling.)  Transfer the pan to a wire rack and let cool completely.

To make the caramel layer, combine the butter, sugar, corn syrup and condensed milk in a medium saucepan over medium heat.  Heat, stirring occasionally, until the butter is melted.  Increase the heat to medium-high and bring to a boil.  Reduce the heat to maintain a simmer, stirring constantly.  Continue simmering and stirring until the mixture turns an amber color and thickens slightly.  Pour the mixture over the shortbread layer, smooth the top, and allow to cool completely and set.  (I chilled at this stage to ensure the caramel layer would not melt when the warm chocolate was added.)

To make the chocolate glaze, combine the chocolate, corn syrup, and butter in a heatproof bowl set over a pan of simmering water.  Heat, stirring occasionally, until the chocolate is completely melted and the mixture is smooth. Pour evenly over the caramel layer and use an offset spatula to smooth the top.  Allow to cool for a minute or two and then sprinkle with fleur de sel.  Chill, covered, until ready to slice and serve.  Store bars in the refrigerator.  Makes about 5 dozen small bars.

source: recipe from annie's eats

Friday, September 14, 2012

Things Making Me Happy This Week

{a wedding ring tan line}

{pretty crate for my eggs}

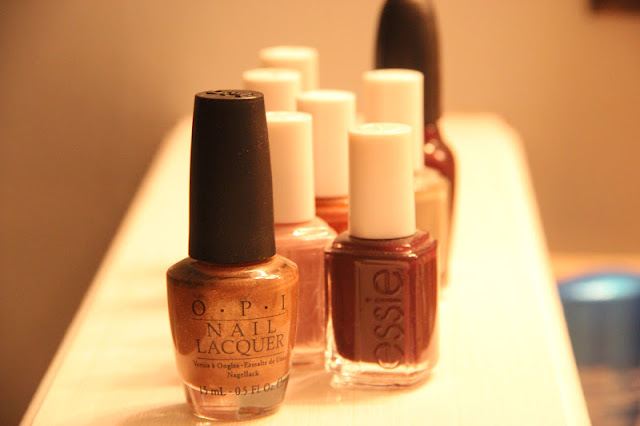
{busting out fall nail colors}

{the best thing ever - seriously}

(looking forward to having these newlyweds visit us}

Have a great weekend!  xx

Wednesday, September 12, 2012

California Pizza Kitchen's BBQ Chicken Pizza


This pizza reminded me of two moments:  first, the blind double date that was set up for my best friend and me while we were in college.  We had BBQ chicken pizza that night.  And we never went on a date with those boys again.  The other thing I thought of was the first time I ate at California Pizza Kitchen.  I was in D.C., getting ready to leave for a study abroad program in China.  No one in the program knew each other, but we were desperate to get to know each other and desperate for one last American meal.  These two memories, completely disconnected, bring me to this pizza. Food Network Magazine always has a "Copy That!" recipe, and the last one I tried (Freckled Lemonade) was super delicious.  This was also delicious, and I realized that the gouda is what I've been missing on all of my previous BBQ chicken pizzas.

CPK's BBQ Chicken Pizza
1 tsp extra-virgin olive oil
1/2 pound prepared pizza dough
1/3 cup + 2 Tbsp dark barbecue sauce
1 8-ounce skinless, boneless chicken breast
salt and freshly ground pepper
3 oz gouda cheese, shredded
3 oz mozzarella cheese, shredded
1/2 small red onion, thinly sliced

Brush large bowl with olive oil.  Shape the pizza dough into a ball, add it to the bowl and turn to coat with the oil. Cover tightly with plastic wrap and set aside in a warm place, 30-40 minutes.

Transfer the ball of dough to parchment paper brushed with olive oil and roll it out into a 10-inch round, stretching it with your hands as needed.  Lightly brush the dough with olive oil, cover with another piece of parchment and set aside to rise slightly, about 30 minutes.

Heat the oven to 425 degrees for at least 30 minutes.  Mix 2 Tbsp barbecue sauce and 1 tsp olive oil in a small bowl. Put the chicken in a greased baking dish, season with salt and pepper and brush with the barbecue sauce mixture. Bake on the middle oven rack until cooked through, about 20 minutes.  Let cool, then cut into 1/2-inch cubes.

Spread the dough with the remaining 1/3 cup barbecue sauce, leaving a 3/4-inch border.  Top with the chicken, gouda, mozzarella and red onion.  Slide the pizza (on the parchment) onto a pizza pan or stone; bake until the cheese melts and the crust is golden, 20-25 minutes.  Sprinkle with cilantro, if desired.

source: recipe from Food Network Magazine, April 2012

Tuesday, September 11, 2012

Our Beach Vacation

We arrived home on Sunday after a week at the beach with my family.  It was such a great vacation!  We had beautiful weather and it could not have been a more relaxing week.  The house my parents rented was right on the beach, so I spent the entire week bouncing from the beach to our pool to our hot tub.  I didn't wear shoes once and I came home with hardly any laundry because I lived in a swimsuit.  A perfect vacation!  It was so great to spend some extended time with my family, and a week at the beach was the perfect goodbye to summer.  Some of my favorite parts of the week...

*walks on the beach with my husband
*celebrating our nephew's 1st birthday
*talking by the pool with my sisters and mom
*sandy little hands reaching up for my hand at the edge of the ocean
*snuggling with my 4-month old nephew
*watching our nieces swim around the pool on their own (they're getting so big!)
*crab stomping our last night there
*my oldest niece wanting me to fix her hair like mine and put on my makeup
*celebrating our 2nd anniversary
*getting to talk with my parents each night when everyone else was busy putting their kids to bed


Friday, September 7, 2012

Guest Post: Thrifted Treasures

Today Aimee is guest posting part 2 of her mini series on thrifting, and she's showing us some of her favorite pieces she's thrifted!  I love seeing pictures of Aimee's house because she decorates so well and has all of these amazing pieces she's fixed up and DIY'd.  Thanks so much for sharing your tips and treasures with us, Aimee!  Have a great weekend everyone! xx

Welcome back to part two of my guest-post about thrifting! Today I will show you some before and after photos of items I have found while thrifting, and then spruced up. Hopefully this will help you start to shop inspired!  

This little mirror was probably the first thing I ever got at a thrift store and then fixed up to my liking. Here is the $2.97 mirror before:
 

 And here it is after!


All this transformation needed was one can of spray paint and two new hooks.  It is amazing how much a new coat of paint or new hardware can change an item into something cool and with lots of character.  When shopping for household items, try to look past the color or surface condition of things, and focus on the shape and structure of it.  This might be hard to do at first, but soon you'll find yourself thinking, "The size of this table is perfect, and if I painted it white, it would coordinate with the room perfectly," or "The shape of that box is so unique, I wonder what it would look like painted red!"  The possibilities are endless when you start seeing items on a shelf as possible canvases for spray paint!


I had been looking for months for a funky little dish to set on my bathroom counter to collect my rings and earrings at the end of the day, and I found this clear, glass leaf dish for .97 cents:


I had actually seen on Sherri's blog how she found a leaf dish and painted it gold, so I stole her idea and painted mine silver.  I ended up only painting the bottom of the dish, so I could still see the lines in the dish that made it look like a leaf.


Something else I had been on a long search for was a tray to put on my kitchen counter to collect my coffee and tea supplies.  I didn't have anything really specific in mind, I just wanted a tray.  And then I found this plain wooden one for $3.97:


I bought a few sheets of scrapbook paper that had a kitchen theme to them; they were covered in old recipes.


I painted the tray yellow, ModPodged the paper to the bottom, and then had this cute little tray!


This chair I found at an antique store, not a thrift store, but I wanted to share the project anyways, to get your creative juices flowing!  Here's the chair before; I paid $12 for it.  The wood was still very sturdy, although a little scratched up here and there, but the canvas was stained and dirty.

And with some very simple sewing to make a new seat and back, here is the chair after!


I paid just under $10 for the fabric (it was on major sale), so this whole chair cost me under $25.  You could easily pay $50 - $80 for a chair like this at a furnishings store!

I also wanted to share with you some great finds of mine, to encourage you to get out there and start thrifting!

A Lacoste belt, for $1.53.


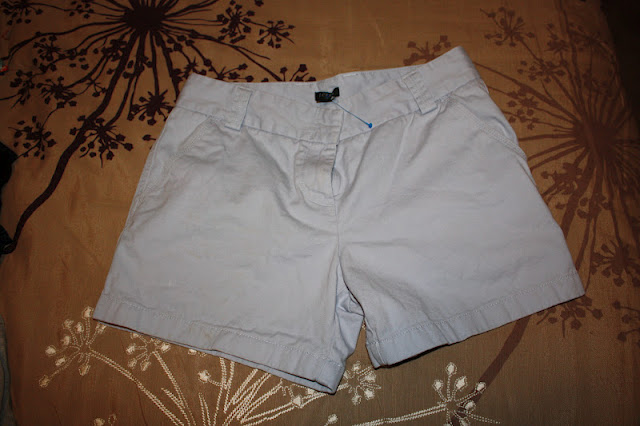
J. Crew shorts in perfect condition for just under $5.


This 49ers Chips and Dip set for my brother-in-law, who is a huge fan.  It's by Pfaltzgraff.  I paid $3.97 for it, and I searched around online and found that others like this retail for about $50!


This really neat lamp made out of an old wine bottle, for just under $6.  It still had a label on it, which I took off, and eventually I want to fill it with something.


I don't have pictures to go with this, but thrifting can be a great way to start or add to a collection.  Whether its milk glass, tea cups, or books about a specific subject, you can find things like this cheap and build a large, unique collection.


Well, that is all that I have.  I hope these posts have been helpful and inspiring!  If you have any questions or would like any more information, you can head over to my blog A Tale of Two Feet and contact me from there!