Wednesday, December 2, 2015

Holiday Gift Guide // for the babies

It's been a little while since I've put together a gift guide, so I decided it's time! This is the first in a mini-series of holiday gift guides for the people in your world. First up - babies! Arguably the most fun to buy for, since everything is so stinking adorable, and babies pretty much love anything they can get their hands on. Here goes:

A sweet robin rattle to shake to their heart's content.


Pretty moccasins, because every baby looks adorable in them. 


A classic board book to read to them over and over again. 


gorgeous quilt, that they will eventually pass down to their own baby.


The softest bunny for snuggling.


The best teether you will ever see, for the (never-ending!) teething phase.


sleek wooden baby gym for playtime. 
(bonus: 10% off with code HAPPYHOLIDAYS2015)


Wooden mirror with flaps, since every baby is a little vain.

Wednesday, November 25, 2015

Chocolate Pecan Pie


I'm sharing two recipes back-to-back because, Thanksgiving. If you need a dessert for tomorrow that's a cinch to throw together, this is your pie. Pecan pie has to be one of the easiest pies to make, so please take an extra 5 minutes and make your own pie crust, too. This chocolate pecan pie has a fudgy chocolate bottom with all of the pecans resting on top. It's a nice twist on a classic without straying too far from the pecan pie everyone is expecting for Thanksgiving dessert.

Chocolate Pecan Pie
4 oz semisweet chocolate, finely chopped
4 eggs, lightly beaten
1 1/2 cups light corn syrup
1/2 cup sugar
1 tsp vanilla extract
1/2 tsp salt
1 pie crust, rolled and fit into a 9-inch pie plate (I used this recipe)
1 cup pecans

Preheat oven to 350 degrees, with rack in lowest position. In a heatproof bowl set over (not in) saucepan of simmering water, melt chocolate, stirring occasionally, until smooth, 2-3 minutes (r melt chocolate in microwave). Set aside.

In a medium bowl, stir together (do not whisk) eggs, corn syrup, sugar, vanilla, and salt. Stirring constantly, gradually add melted chocolate. Pour filling into prepared crust; place pie plate on a rimmed baking sheet. Arrange pecans in one even layer over filling.

Bake just until set (filling should jiggle slightly when pie plate is tapped), 50-60 minutes, rotating halfway through. Let cool completely on a wire rack, at least 4 hours (or up to overnight) before serving.

source: recipe from Martha Stewart

Monday, November 23, 2015

Morning Glory Muffins


This time of year is one of my favorites: the temperatures have finally dropped, making for chilly mornings where I allow myself to cuddle up with a cup of coffee while I read my Bible. Since we typically have muffins or some kind of baked treat in the house, I also grab one of those for a little mid-morning pick-me-up while Madeleine takes her nap. Last week I tried this recipe for Morning Glory muffins, and Caleb and I both loved how packed full they were of different flavors. This recipe was perfect because I had an extra Granny Smith apple on hand and also a bunch of carrots that I needed to use up. This makes a lot of muffins if you're hosting a crowd for Thanksgiving this week, but I also halved the recipe and they turned out great.

Morning Glory Muffins
4 cups flour
2 1/2 cups sugar
4 tsp baking soda
4 tsp ground cinnamon
2 tsp salt
12 carrots, peeled, coarsely grated in food processor (4 cups)
1 cup raisins
1 cup chopped pecans (4 ounces)
1 cup sweetened flaked coconut
2 Granny Smith apples, peeled, cored, and coarsely grated with box grater
6 eggs
2 cups vegetable oil
2 tsp vanilla extract

Put a rack in middle of oven and preheat oven to 350 degrees. Generously butter 30 muffin cups.

Whisk together flour, sugar, baking soda, cinnamon, and salt in a large bowl. Stir in carrots, raisins, pecans, coconut, and apples. Whisk together eggs, oil, and vanilla in another bowl, then add to flour mixture and stir until just combined.

Spoon batter into muffin cups, filling them to the top. Bake muffins, in batches if necessary, until springy to the touch, about 30 minutes per batch. Cool in pans for 5 minutes, then turn out onto a rack and cool to warm or room temperature. Makes about 30 muffins.

source: recipe from The Gourmet Cookbook

Thursday, November 19, 2015

An Announcement: We opened an Etsy shop!

Last week Caleb and I opened an Etsy shop! Several months ago Caleb made Madeleine a baby gym, and everyone kept telling us we should sell them. So, we decided to go for it!

Having a baby means that baby gear is inevitable. This was the one aspect of becoming parents that Caleb and I were not super excited about; we both like things to look nice, and we are both very organized. This does not leave a lot of room for a house full of baby toys, specifically ugly, plastic, clunky baby toys. We realize that babies do need certain toys and paraphernalia, but we are picky about what we bring into our house for Madeleine.

One thing that we put our foot down on was the plastic play mat/baby gym. We did not want a brightly colored, huge piece of plastic sitting in our family room. Thankfully I have a husband who is extremely talented, so Caleb made this sleek, wooden baby gym instead. I love the clean lines and modern look, and it doesn't bother me at all to have it in our living room! These are the two slightly different wooden baby gyms that we have listed in our Etsy shop:

Wooden Baby Gym
Wooden Baby Gym

I love that we can pick out our own toys (or you could make them, if you're crafty like that) to hang from the baby gym. Caleb also made the gym to come apart easily, so we've even traveled with it.

Right now all we are selling in our Etsy shop is the wooden baby gyms. We anticipate that as Madeleine gets bigger, we will find new things that we want to make for her. If they are a success, we will add them to our shop. It's fun to have something that will grow with Madeleine! 

To celebrate the opening of our little shop and the start of the holiday season, we are offering my blog readers 10% off all orders now through December 15 with the code HAPPYHOLIDAYS2015. Spread the word to all those with babies in your life! And add one of these wooden gyms to your baby's Christmas wish list and pass the coupon code to the grandparents :)

Our Etsy shop is called Frog + Flamingo, and you can find it here

Wednesday, November 11, 2015

The Best Brownies


I have always been a box mix brownie kind of girl. The box mixes are BOGO almost every week, they take all of 2 minutes to throw together, and I actually find them more delicious than homemade brownies. UNTIL NOW. Earlier this week I needed to make a bunch of brownies to take to a church event, so I decided to make several different kinds and for once and for all decide which brownie was the best. I tried a new recipe for a batch of homemade brownies, and I also made a Hershey's box mix and (my favorite) Ghirardelli box mix. I took a mixture of all three to the church event, and saved some of each for Caleb and I to do a blind taste test. 


The above photo shows how each brownie turned out. The Hershey's looks like it's going to be the richest as it's the darkest in color, the Ghirardelli looks like your standard brownie, and the homemade brownie is totally dominating the scene at twice as large as the box brownies. Here's how the taste test went down:

#1: Ghirardelli // we liked the chocolate chips, it was super chocolately, and pretty moist
#2: Hershey's // sticky, gooey, more milk chocolately, not as intense flavor, not as good as Ghirardelli, would not eat again
#3: homemade // richer, liked the chocolate chips, more of a brownie texture, moist, most intense flavor, hands down our favorite

We were both surprised that the homemade brownie was our favorite! We have declared this brownie recipe the best brownies we've ever eaten - they are that good. The winning recipe is originally from Taste of Home magazine, and the recipe is below, with my minor adjustments included.

Ultimate Fudgy Brownies
1 cup sugar
1/2 cup packed brown sugar
2/3 cup butter, cubed
1/4 cup water
20 oz bittersweet chocolate chips, divided (I used Ghirardelli)
4 eggs
2 tsp vanilla extract
1 1/2 cups flour
1/2 tsp baking soda
1/2 tsp salt

Preheat oven to 325 degrees. Line a 9-inch square baking pan with parchment paper, letting ends extend up and over sides.

In a large saucepan, combine sugars, butter, and water; bring to a boil, stirring constantly. Remove from heat; add a generous 1 3/4 cups chocolate chips (this was a little more than a 10 oz bag). Stir until melted. Cool slightly.

In a stand mixer fitted with the whisk attachment, whisk eggs until foamy, about 3 minutes. Add vanilla extract; gradually whisk in the chocolate mixture. In another bowl, whisk flour, baking soda, and salt; stir into the chocolate mixture. Fold in remaining chocolate chips.

Pour into prepared pan. Bake on a lower oven rack 40-50 minutes or until a toothpick inserted in center comes out with moist crumbs (do not overbake). Cool completely in pan on a wire rack.

Lifting with parchment paper, remove brownies from pan. Cut into 16 squares.

source: recipe adapted from Taste of Home, September/October 2015

Monday, November 9, 2015

Perfect tote for baby gear


I've always been one to have quite a collection of totes + purses, but becoming a mother has taken that to an entirely new level. There is just so much stuff!!! Even with us trying to be as minimalist as possible, the amount of gear that comes with a baby is ridiculous. I have my eye on this tote from Brim Papery. It'd be perfect for schlepping diapers, wipes, and other baby necessities during all of our travels this holiday season, don't you think?

Friday, November 6, 2015

Links for your weekend


Drooling over this cake

Loved this post about random turn-ons. What are yours?


This post on stocking up for soup night essentials was so helpful! I'm adding some of these to my grocery list this week.

It's been two weeks, but I'm still listening to this on repeat. Anyone else with me?? 

Are you going to see this movie that just came out? I think it looks so good! I just got the book so I'm going to read that first.

I found the most perfect dish towel. And then it sold out this morning while I was in the process of checking out.


(image via)

Wednesday, November 4, 2015

Do your kids take vitamins?

I've been reading French Kids Eat Everything, trying to learn the secrets of not having a picky eater. Even if you do have perfect little French children who happily eat all of their veggies, a multivitamin never hurts!


Rainbow Light's Power Sours Multivitamin Gummies are perfect for your kids ages 4+, promoting healthy bones, brain, and eyes! These gummies are 100% natural: no artificial colors, flavors, sweeteners, additives or preservatives! And they're gummies, which means you can pass them off as candy to your kids :)

You can shop for these gummies plus vitamins for the whole family here. Do you take vitamins? What vitamins do you give to your kids?

Disclosure: I received this product for from from the sponsor of the Moms Meet program, May Media Group LLC, who received it directly from the manufacturer. As a Moms Meet blogger, I agree to use this product and post my opinion on my blog. My opinions do not necessarily reflect the opinions of May Media Group LLC or the manufacturer of this product. 

Monday, November 2, 2015

Cinnamon Crumble Apple Pie


I have a little tradition of making an apple pie each time my parents come to visit us in the fall. I'm not one for repeating recipes, so I've made a different apple pie each time for the past several years. (You can see all the apple pies I've made so far here). I have to say that this is my favorite one so far. The filling is not overly sweet, and I prefer this crumble topping to a double crust pie. We found that this pie tasted even better the second day, so don't worry about needing to finish it all right away. This would be the perfect addition to your Thanksgiving pies, since it's very simple to throw together. Happy Monday!

Cinnamon Crumble Apple Pie
one homemade pie crust dough, refrigerated for 30 minutes (I use this recipe)

for the filling
3 1/4 pounds Granny Smith apples, peeled, cored, sliced 1/4-inch thick
2/3 cup sugar
2 Tbsp flour
2 tsp ground cinnamon
2 Tbsp unsalted butter, melted

for the topping
1 cup flour
1/2 cup sugar
1/4 cup packed brown sugar
1 1/2 tsp ground cinnamon
1/2 tsp salt
6 Tbsp chilled unsalted butter, cut into 1/2-inch cubes

Position rack in center of oven and preheat to 400 degrees. Roll out dough on lightly floured surface to 12-inch round. Transfer to a 9-inch-diameter pie dish. Trim overhang to 1/2-inch; turn edge under and crimp decoratively. Refrigerate while preparing filling and topping.

for the filling: Mix all ingredients in large bowl to coat apples.

for the topping: Stir together first 5 ingredients in a bowl until well combined. Cut in chilled butter cubes with a pastry cutter, cutting in until mixture resembles wet sand.

Toss filling to redistribute juices; transfer to crust, mounding in center. Pack topping over and around apples. Bake pie on baking sheet until topping is golden, about 40 minutes (cover top with foil if browning too quickly). Reduce oven temperature to 350 degrees. Bake until apples in center are tender when pierced and filling is bubbling thickly at edges, about 45 minutes. Cool until warm, about 1 hour. Serve with vanilla ice cream.

source: recipe barely adapted from Bon Appétit

Friday, October 30, 2015

What I Learned // October 2015

And just like that October is over and we're entering into the holiday season! I can't even believe it. Before we head into planning our Thanksgiving menus, here's what I learned in October.


The secrets to delicious chocolate chip cookies. My mother-in-law graciously shared her tips with me for perfect cookies, and I successfully made a batch this month. One of the things I had been doing wrong was allowing the cookies to cool on wire racks rather than directly on the counter. Game changer! One evening over these cookies + milk, Caleb said, "I'm so glad you learned how to make cookies like my mom."


The postpartum wardrobe is all about the accessories. I've resigned myself to the fact that until I'm done nursing, I just won't be able to be back to my pre-pregnancy size. To make do until then, I'm adding in all the accessories to brighten up my wardrobe of basics.


Running with a friend pushes you to go faster. My friend Jessi and I signed up for a 5K as a goal to get our butts back in shape after having babies this summer. We walk together once a week, but we've never run together, and I've always just run by myself. Our 5K was a couple of weekends ago, and we stayed together the whole time! Jessi pushed me to go faster than I normally do, and we ended up finishing with my fastest 5K time ever (even pre-baby!). I'm still pretty slow, but it encouraged me to know that I can push myself to go a little faster than I'm normally comfortable with. More thoughts on running here.


I do not like Brussels sprouts. I didn't have high hopes that I would, but I roasted a bunch to try out anyway. They were weird and not as gross as lima beans, but not something I would like to eat again. Also, I learned that it's really hard to pronounce the "s" at the end of Brussels when you say Brussels sprouts without sounding like a weirdo. I just kind of slur them together.


I am more easily spooked since becoming a mom. I started reading the newest Kate Morton book this week, and I am getting too freaked out to read it in bed at night! And it's not even scary by any means! It's a little suspenseful like all of her books, but for some reason this one is making it so that I can only read it during the day. It is very good, by the way, so if you love her books, definitely pick this one up!

Did you learn anything in October?

Wednesday, October 28, 2015

Macaroni & Cheese


I've recently been going through my cookbooks, looking for new recipes to try out as well as trying to determine which cookbooks I'd like to hold on to and which ones I never use. The Gourmet Cookbook is most definitely in the "to-keep" pile; everything I've made out of it is absolutely delicious. I tried the mac & cheese recipe out about a month ago, and I loved that I could subtly taste the Dijon mustard in the sauce. If you're looking for a mega cheesy recipe, this is not it, but it's delicious and creamy and perfect for these rainy fall days.

Macaroni & Cheese
for topping:
2 Tbsp unsalted butter, melted
2 cups panko or coarse dry bread crumbs
1 cup coarsely grated extra-sharp Cheddar (about 4 oz)

for cheese sauce & macaroni:
3 Tbsp unsalted butter
3 Tbsp flour
1/2 tsp red pepper flakes
2 3/4 cups whole milk
3/4 cup heavy cream
4 cups coarsely grated extra-sharp Cheddar (about 1 pound)
2 tsp Dijon mustard
1 1/2 tsp salt
1/4 tsp freshly ground black pepper
3/4 pound elbow macaroni

Put a rack in middle of oven and preheat oven to 400 degrees. Butter a 3-quart shallow baking dish.

Make the topping:
Stir together butter, panko, and cheese in a bowl until well combined.

Make the sauce:
Melt butter in a 5-quart heavy pot over moderately low heat. Whisk in flour and red pepper flakes and cook, whisking, for 3 minutes to make a roux. Whisk in milk in a slow stream, then bring sauce to a boil, whisking constantly. Simmer, whisking occasionally, for 3 minutes. Stir in cream, Cheddar, mustard, salt, and pepper. Remove pot from heat and cover surface of sauce with wax paper to prevent a skin from forming.

Cook the macaroni & assemble the dish:
Cook macaroni in a 6-quart pot of boiling salted water (1 Tbsp salt per every 4 quarts water) until al dente. Reserve 1 cup pasta cooking water and drain macaroni.

Stir together macaroni, reserved cooking water, and sauce in a large bowl, then transfer to baking dish (mixture will be loose).

Sprinkle topping evenly over macaroni. Bake until top is golden and bubbling, 20-30 minutes. Serves 8-12.

source: recipe from The Gourmet Cookbook

P.S. More mac & cheese recipes.

Monday, October 26, 2015

What to do with leftover Halloween candy

If you're stuck with lots of extra candy after this week and need a few ideas to use it up (besides shoving it all in your mouth piece after piece), I rounded up a few recipes that I wouldn't mind trying. Here's the cheat sheet, with recipes at the links below:


(source: candy pictures from Wikipedia + respective brand websites)

Friday, October 23, 2015

On Running with a Baby


I've concluded that running with a baby has to be one of the most taxing of exercises. Let's think about this for a moment. You're pushing a baby in a stroller. For me, that means a 15-pound baby, a 25-pound stroller, and a 10-pound carseat. I'll do the math for you: that's 50 pounds I'm pushing up and down hills. On top of all of the weight you're pushing, you're carrying all of the weight that's still clinging to you from being pregnant with that now 15-pound baby. (I'll spare you the details on exactly how much that still is for me.) And, if you're breastfeeding, you're also carrying along your baby's next meal.

So we've got a 50-pound load you're pushing, extra weight you're carrying from pregnancy, plus essentially a picnic for the baby strapped to your chest. And, if you're like me who barely exercised during pregnancy, you are pretty out of shape.

All of that is physically demanding and quite a workout. Now let's add in the mental workout of this situation. As you're running through your neighborhood, smiling and waving at neighbors and for the love just trying to push that dang stroller up that hill, you are also constantly aware of what your baby is doing and anticipating what your baby might need. Ok she just spit up, grab the burp cloth and wipe that nastiness off her little chin. Oh no, she's starting to fuss. Quick! put the toy snail in her hand. Ok that's not working, squeeze the snail's head a few times so it squeaks. Ok whew, she smiled. We're good.


And then, right when you've finished a couple of miles and you're starting to get a cramp in your side, the baby finally falls asleep. And so you just keep running. Because, sleeping baby. That elusive evening catnap finally won over the fussy baby and you can't stop running now. You run a couple more miles so that the baby will sleep and wake up ready to play happily during dinnertime.

And then when you put the baby down for bed that night and finally have a chance to log your exercise into your weight-loss app, you do a happy dance when you realize you have just enough calories left to treat yourself to a tiny bowl of Häagen-Dazs mint chip ice cream. And in that moment, you decide those extra miles were totally worth it.

Wednesday, October 21, 2015

3 Subscription Boxes Worth Trying

Do you receive any subscription boxes in the mail? I got Birchbox for a long time, but after a while I stopped enjoying the products they were sending, so I canceled it. I've debated back and forth on signing up for Stitch Fix, but because I'm so picky, I don't like the idea of potentially being out $20 and not ending up with any items. But! these three boxes I would actually be interested in trying, because I think they would be worth it! 

Evereve Trendsend
A couple of outfits that you can mix + match. Plus, you only pay for what you keep!

A lifestyle box with items for fashion, beauty, food, home, and fitness. I love the variety!

Cute + unique notecards for those of us that still send snail mail.

Do you already receive any of these? What's your experience - yay or nay?

Monday, October 19, 2015

Why Not Me?


A couple of weeks ago I received Why Not Me? in the mail, and as soon as Madeleine was in bed for the evening, I sat down on the couch and started reading it. I loved this book! I also read Is Everyone Hanging Out Without Me?, but I have to say that this new book of Mindy's is even better. I laughed out loud more than a few times, and I even read several parts to Caleb because I thought they were so funny. Laughing and reading good books are some of my favorite things to do, so put them together and I'm pretty much going to love it. Mindy shares a lot about her life that I didn't know and found very interesting. If you find her funny and like her show or enjoyed her other book, definitely pick this one up!

Disclosure: I received this book from the Blogging for Books program in exchange for this review. The review and opinions are 100% my own.

Friday, October 16, 2015

8 Pumpkin Recipes for Fall


Chocolate Chip Pumpkin Bars // Pumpkin Apple Bread // White Chocolate Pumpkin Snickerdoodles

One of my favorite things to do in the fall is spend time in the kitchen baking pumpkin treats. There are so many pumpkin recipes out there! But these 8 recipes are some of my absolute favorites. If you're looking to bake a fall treat this weekend, try out one of these recipes! Happy Friday!

Wednesday, October 14, 2015

Decorating the Nursery

This post is included in Wayfair's campaign #NurseryTale: sharing the story behind my favorite nursery pieces. Find more great nursery pieces at Wayfair.com


Several months ago I shared Madeleine's nursery reveal, but today I'm sharing a little bit more about the story behind some of the pieces in Madeleine's room and my tips on decorating a nursery.  The entire nursery was a labor of love, and it was such a joy to bring together my vision for the room as we anticipated the arrival of our precious daughter.

Choose a theme or a color scheme. There are a ton of nursery theme ideas on Pinterest you can browse through, or you can simply choose a color scheme you'd like to go with. I wanted Madeleine's nursery to be a space that was calming and feminine, and one that she could continue to enjoy and grow into, so I decided to choose a color scheme rather than a specific theme. I chose a soft pink for the walls, white furniture, and accents of gold and black. If you've chosen a rug, curtains, bedding, or something else that has the specific colors you'd like to incorporate, choose your paint color after you've picked out those items. It is much easier to find a paint color to match the room than later trying to find curtains that match already-painted walls!


Pick out the big pieces. It's easier to decorate and fill in the spaces around the furniture, so we worked on selecting the furniture for Madeleine's nursery first. We wanted a crib that was a little bit more modern, and we love the convertible crib that we selected. After much searching, we finally found the perfect glider at 
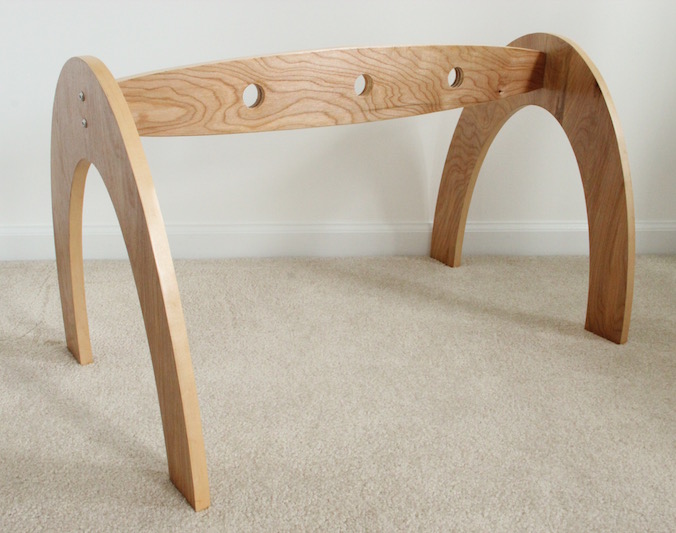
Wayfair. Caleb designed and built both the bookshelf and the dresser/changing table, and we hope that Madeleine will be able to use these pieces for years to come. Think beyond the initial baby stage and choose furniture that can be used for several years, whether it's a convertible crib, a dresser that can also function as a changing table, or tables and shelves that can be used throughout childhood.


Incorporate handmade items. We really wanted Madeleine's room to be filled with very intentional pieces, which resulted in a lot of handmade items decorating her room. In addition to the furniture that Caleb built, the basket of blankets on Madeleine's shelf is full of handmade blankets, made by one of Madeleine's aunts and one of her great-aunts, as well as several that I made. The hairbands that sit on top of Madeleine's bookshelf were all made by family and friends at one of my baby showers. The tassel garland was made by one of my friends and was used as a decoration at one of my other baby showers. I love looking at these pieces and remembering how our family and friends were so excited for us and showered us with so much love as we were expecting our first baby, and as Madeleine gets older it will be special to share with her how much love went into her room and the pieces in her room. Handmade items are what can set your nursery apart from others' nurseries, and it's also fun to think about the time, effort, and love that went into creating each item.


Make it personal. The wooden signs that hang in Madeleine's room are also very special to me. The signs above both the crib and the changing table are custom pieces made by a dear friend who runs Olive + Grey. Above the changing table are three signs that say baby in English, Chinese, and French. This has great significance to me as I lived in China for several years as a child and have spent many years studying and speaking Chinese. I also studied French for several years, and Caleb took me on a dream-come-true trip to Paris several years ago. My degree is in international politics and I love for traveling, so it's only natural for me to hope that Madeleine will love foreign languages and appreciate foreign cultures like I do.


Make it practical. Even though as an infant Madeleine can't really get into anything, I still wanted to set up her room in a way that would function well when she is mobile and getting into things. The shelves are open and low so that she will be able to reach for her toys and books, but the top shelf is reserved for items that she shouldn't be getting into (headbands, the lamp, etc.). We left a good amount of floor space in the room as well, so that as she gets bigger and enjoys playing, there will be plenty of room for her to spread out and play on the floor.


Let the room grow with the baby. I had planned on making Madeleine a mobile before she was born, but she was (thankfully!) born a little bit early, and I never got to make it. Now that Madeleine is in a stage where she loves playing and enjoys watching anything that moves, I finally got around to making a simple ribbon mobile for her to look at while she nurses. Now we just need to hang it up! It will be fun to continue to incorporate new items that Madeleine will enjoy as she hits new developmental milestones and continues to learn and enjoy new things in her environment.


What tips do you have for decorating a nursery? Decorating Madeleine's nursery was definitely one of my favorite projects I've ever done! Thanks for taking a peek into her room. All sourcing information is below!


sources: paint: Behr in "Hush Pink" | curtains: Land of Nod | crib: Target | crib bedding: Target | blanket: crocheted by me | wooden signs over crib: Olive + Grey | glider: Wayfair | pillow: Target | Love Never Fails print: Lindsay Letters | bookshelf: designed by me + built by Caleb, inspiration from Oeuf + CB2 | tassel garland: made by a friend as a baby shower decoration | lamp base: Target | lamp shade: Target | | gold flower bowl: Home Goods | hairband organizer: Home Goods | floral heart print: Rifle Paper Co | piggy bank: Target | black rugby stripe bins: Amazon | wooden rainbow stacker: Melissa & Doug | wooden birdie stacker: gifted | wooden alligator: Buy Buy Baby | wooden zebra: Pottery Barn Kids | dresser: designed + built by Caleb, inspiration from Pottery Barn Kids | white + black basket: gifted | changing pad cover: aden + anais | wooden signs over dresser: Olive + Grey 

Monday, October 12, 2015

5 Products I'm Using Every Day

I love trying out new beauty products, so there is a constant rotation through my bathroom of new hair, makeup, and skin care products. While I try many things that I like decently well, the true test of a great product is if it stays in my regimen for more than a couple of weeks. These 5 products are ones that I am using every. single. day. and have been for several months now.


Softsoap Basil & Lime Hand soap // This has got to be the best hand soap I've ever used that you can purchase at a big box store. I have a really sensitive nose, so I am very particular about what kind of hand soap I use, since I can smell it long after I've finished washing my hands. My mother-in-law had this soap at her house over the summer, and I immediately knew I needed it. I've stocked up on it in case they ever decide to stop making it.

Bath & Body Works Aromatherapy Body Cream in Eucalyptus Tea // My aunt brought me a sweet gift bag of several items right after Madeleine was born, and this body cream was one of them. I've been using it on my hands every night when I get into bed since Madeleine was about a week old. It really is very calming, and I love that this scent will forever remind me of those early days when Madeleine was so tiny and new.

Olay Regenerist Luminous Tone Perfecting Cream // It's so hard for me to find a moisturizer that I love. I lean towards having dry skin, so I want it to soak in and moisturize without leaving my skin greasy. This cream is not heavy at all, but it leaves my face feeling so smooth. Bonus: it smells SO good (notice a trend here??).

Dove Advanced Care Nutrium Moisture Deodorant in Caring Coconut // I don't know if it's just me, but since becoming a mom I sweat like nobody's business. Between carrying a heavy carseat with a growing baby in it, to having said baby right up against me eating every few hours, I am constantly hot. I've used Dove deodorant for as long as I can remember, but this newer line of the nutrium moisture is my favorite. It goes on really smooth and--you guessed it--smells good. It smells better than that powdery scent of most deodorants, but the scent isn't so strong that it's trying to act like your perfume.

John Freida Beach Blonde Smooth Seas Detangling Conditioner // I really like John Freida products for my hair, and I think this might be my favorite one yet. My hair gets really tangly and just a small amount of this conditioner detangles really well. It's also lightweight, which I need since my hair is pretty fine. It has a minty scent to it which is really refreshing and energizing.

Do you already use any of these products? What are some products that you are using every day?

P.S. More 5 Things Posts

Wednesday, October 7, 2015

Five Things Every Day


shared last week that I was loving this series, and today it was an honor to have a guest post included in the series! Lauren is one of my favorite people ever. I'm not even kidding - she is one of my sisters and one of my best friends and one of the godliest women you'll meet! Her blog always encourages me (as does her instagram!). You can read my post here, and be sure to read all of the posts so far in the series here! Even if you don't have daughter (or kids), this series is full of valuable lessons for anyone. Head on over to Lauren's blog!

Monday, October 5, 2015

Madeleine // 4 months


Since becoming parents, what we've been told more than anything is that time goes by so quickly. We can't even believe how true that has been. A year ago yesterday we found out that I was pregnant, and today our sweet Madeleine turns 4 months old! It has gone by so incredibly fast. 

We love this girl more than words can say! She was an extremely squirmy infant, and she has only gotten more and more wiggly! Madeleine does not like to sit still and loves to play, be read to, be sung to, and just be with her Mommy and Daddy. She loves being outside and gives us the best smiles. Madeleine adjusted to a good schedule early on, and that has helped her to be a very happy and content baby. After a rough start to nursing, we are very thankful that she is now a good eater! She also has been sleeping through the night since she was 11 weeks old. This girl makes us laugh so many times a day. Our lives our fuller because of Madeleine, and we praise God for giving her to us!

Friday, October 2, 2015

Links for your weekend


What are your plans for this rainy fall weekend? With the forecast the way that it is, I think it's pretty safe to say we will be staying inside! It looks like it will be a weekend of movies + college football, fall-scented candles, and dinner in the crockpot. Hope you stay warm + dry this weekend!

How cute is this closet turned nursery?!

I'm not a huge fan of the Adam Lippes for Target line, but I can get behind these shoes.

Would you walk across this 1,000-foot glass bridge? I definitely would NOT.

I'm looking really forward to reading this blog series.

A cute Halloween costume idea for both adults + kids.

I love this idea of having a focused collection that you can also use.

New Yorkers, rejoice: Chick-fil-A is comin' at ya.

What a beautiful birthday party.

Just finished Mindy Kaling's new book last night - I loved it!

(image via)

Wednesday, September 30, 2015

What I Learned // September 2015

It's time for another "What We Learned" post! Summer is officially over, and I am excited about moving into October and enjoying fall weather. But first! here are a few things I learned in September.


This trail mix is perfect for fall. I love candy corn but hesitate to buy a whole bag since that means I will then consume the whole bag. This stuff gives me my candy corn fix, plus a delicious handful of other stuff. Once again, thank you Target for having everything I ever wanted and needed #dramaticmuch


Marriage truly does get better and better. We celebrated our five-year anniversary earlier this month, and I love Caleb so much more now than the day I married him! Our love is deeper and stronger, and I can't wait to do the next 65 years with him.


I like modern art. I did a round-up of art from Minted Art, and I was surprised at how most of my favorites were a little more modern, especially since I tend to lean towards traditional or classic pieces in my decorating. Still trying to decide which pieces I'm going to purchase...


A little braid can go a long way. I love reading Kate's blog, and she recently posted a fresh in fifteen video where she did a messy bun with a little side braid. I've been doing the same thing for casual days at home/running errands, when I don't feel like spending more than 2 minutes on my hair (ok let's be honest...that's most days). I love that it gets my hair out of my face and looks like I at least tried.


Family is a treasure. Last month Madeleine and I spent a week at my parents' house, and we also went to visit my grandparents. I loved spending extended time with family, and it was really special to introduce Madeleine Ruth to her great-Grandmom Ruth. I've always hoped I would be able to spend time with my daughter, my mother, and my grandmother at the same time. Four generations of ladies - a treasure, for sure!

What did you learn in September?

Monday, September 28, 2015

DIY Painted File Cabinet

Last summer my big home project was redoing the craft room + office, which I wanted to be full of bright and fun colors. We still needed it to be a functioning office, which meant we still needed a file cabinet. I had in my mind that I wanted a yellow file cabinet, and I had my eye on this particular one (which I still love!). However, I couldn't justify spending $300 on a file cabinet, and Caleb definitely was not on board with that. Instead we decided to try to paint the black file cabinet we already had. It looked very similar to this one: 


To start, we removed the drawer pulls. Then I scuffed the entire file cabinet with Scotch Brite scouring pads, to roughen up the surface and help the spray paint to stick. This took quite a while, as there was a lot of surface area to cover. Once we felt like the cabinet had been roughened up enough, we wiped down all of the black dust the scouring had created. We made sure the file cabinet was super clean and dry before starting to paint. Caleb is the spray painter in our house (I always have so many drips!), so he then primed the file cabinet with spray paint primer. After a coat or two of that, he took to spray painting it with the yellow spray paint. It took several coats to cover up the black, but it was worth it! I'm so happy with the way it turned out, and for about $20 we now have a yellow file cabinet.


If you're looking for a colorful file cabinet, I would suggest trying to spray paint an old one first! It really was an easy DIY project, and you can find cheap file cabinets on Craigslist if you don't already have one. Let me know if you try it out!

(black file cabinet photo via)